Between rising energy costs and the changing seasons, insulating your home has become more critical than ever. When done correctly, proper insulation techniques will not only keep your house warm in the winter but also cool and refreshing in the summer. Additionally, it provides comfort, reduces those hefty utility bills, and helps your home run more efficiently year-round.
Whether you’re upgrading an older property or building a new one, insulating your home and understanding how insulation works are always the first steps toward ensuring your home is comfortable and cost-effective. Let’s take a look at everything you need to know about insulating your home.
Insulating Your Home: Getting Started
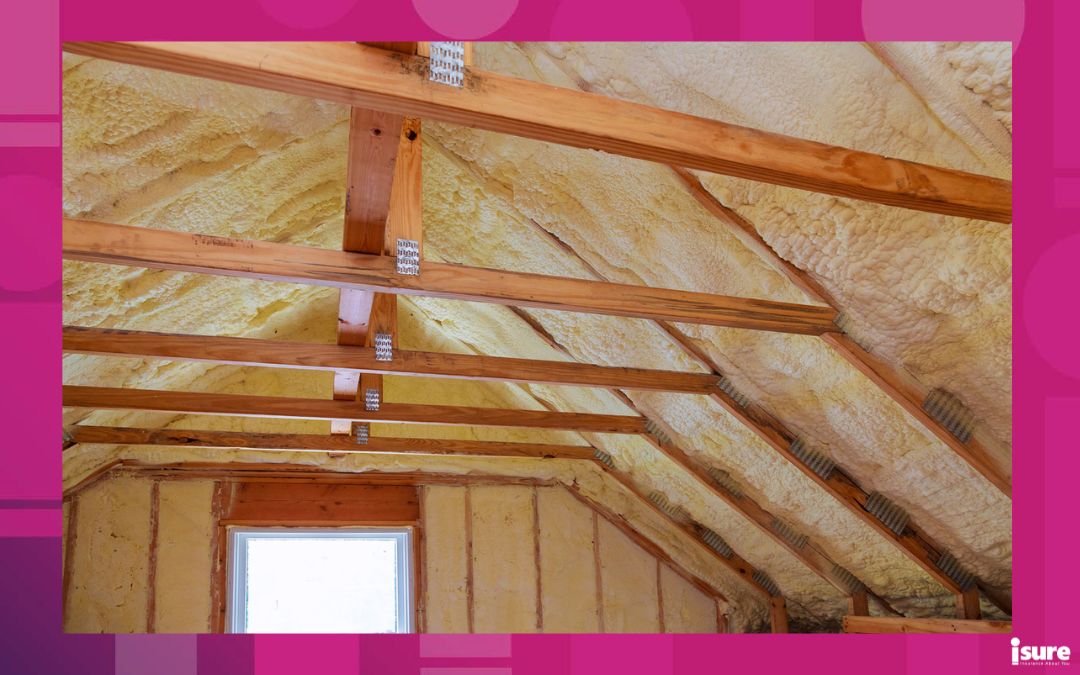
Insulating your home may sound like a daunting task, but it doesn’t have to be! To start, you’re going to want to get a good idea of the way your home is laid out. This can be done by quickly sketching your home’s floor plan. This will serve as a reference point and help you locate any areas of leakage. Remember to make note of any dropped soffits over your kitchen cabinets and bath vanities. You should also make note of any dropped-ceiling regions or areas where walls meet the ceiling that may be slanted over airways.
Can I Insulate My Home Myself?
If your attic is accessible and you can move around in it, insulating your home can be a do-it-yourself project that takes only a day or two. However, there are some cases in which you may want to hire a contractor to correct any problems before you proceed. According to energystar.gov, these problems are as follows:
- Wet insulation indicates a leaky roof
- Mouldy or rotted attic rafters or floor joints indicate moisture issues.
- Kitchen, bathroom, and clothes dryer vents are exhausting moist air into the attic instead of outdoors.
- A history of ice dams in the winter.
- Little to no ventilation in your attic.
- If your house is older, make sure you don’t have any knob or tube wiring (pre-1930), as this can be a fire hazard when in contact with insulation.
- “Can lights” that are unsealed require special care when insulating around them.
Insulating Your Home: Locating Air Leaks
When winter rolls around, you’re most likely to notice any air leaks in your home. In most scenarios, people refer to these air leaks as “drafts.” You may feel these drafts around windows and doors. A common misconception is that these leaks are a significant source of wasted energy. Though valid to a certain extent, the most critical air leaks in your home are likely hidden in your attic or basement. These leaks will result in your energy bill skyrocketing and make your home uncomfortable, not only in the winter but year-round. Locating these air leaks can be difficult. Not only are they in sometimes hard-to-reach places, but they are often hidden under your insulation.
In cold weather, warm air rises in your home. This air, which you have paid to heat, is then wasted as it grows to your attic and sucks cold air around your home, around windows, doors and through holes into the basement.
Where Are Air Leaks Most Common?
When you take on a project like insulating your home, you must find all the air leaks your home has. Luckily, most common household air leaks are pretty easy to find. Let’s take a look at some of the most common areas for household air leaks:
- Windows and Doors
- Attic Hatch
- Plumbing Vent
- Behind Kneewalls
- Open Soffit
- Recessed Light
- Furnace Flue
- Basement Rim Joists
Locating Basement Air Leaks
A common area in which air leaks are apparent is the basement. More specifically, along the top of the basement wall, where the cement meets the wood frame. These leaks can easily be fixed in areas where the basement is unfinished.
Since the top of the basement wall is above ground, outside air can be drawn in through cracks and gaps where the house framing sits on top of the foundation. This perimeter framing is called the rim joist. In basements, the above-floor joists terminate at the rim joist, creating cavities along the length of the wall. This creates opportunities for leakage.
Insulating Your Home: Sealing Air Leaks
Like any home improvement project, it is essential to have a plan in place. Make sure you gather all your tools and supplies to minimize trips in and out of the attic. Make sure your work area is well-lit by using a droplight or a portable flashlight!
Keeping Safe During The Project
The entire process of sealing your attic or basement can be made easier if you take the time to invest in the right gear. Make sure you wear knee pads to prevent any pain. Additionally, it’s essential to wear safety glasses, gloves, and protective eyewear. Make sure you wear a sleeved shirt and pants, or a disposable coverall, to keep itchy, irritating insulation off your skin.
If you plan to do your project during the summer months, make sure you start early, as attics tend to heat up as the day progresses. When in the attic, always walk on joists or truss chords, not on exposed ceiling or drywall insulation! Lots of older basements and attics may have sharp nails exposed, so keep an eye out for them as well!
Materials Checklist
To properly seal air leaks when insulating your home, you’ll need materials to ensure you can get the job done. Let’s take a look:
- Roll of fibreglass insulation
- Roll of reflective foil insulation
- Garbage bags for stuffing open stud cavities behind kneewalls and in dropped soffits
- Silicone or acrylic latex caulk & caulk gun for sealing small holes
- Cans of expanding spray foam insulation
- Roll of 14-inch wide aluminum flashing
- Retractable utility knife and sheet metal scissors
- Tape measure
- Staple gun
- Safety glasses, gloves and a dust mask
- Flashlight or portable safety light
- Large bucket to haul materials
- Boards to walk on, if necessary
Sealing Air Leaks In Your Attic
When you’re sealing leaks in your attic, it is essential to find any big holes and not worry about the little ones. Refer to your sketch to locate areas where leakage is most likely to occur. This can include where walls meet the attic floor, dropped soffits and behind or under attic kneewalls.
You must keep an eye out for any dirty insulation, as this can indicate that air is moving through it. On top of this, dropped soffits may be filled or covered with insulation, making them difficult to spot. Push back the insulation and scoop it out of the soffits. This insulation will then be placed back over the soffit once the stud cavities have been plugged and the soffit is covered.
It is critical to remember that some older attics have vermiculite insulation, which may contain asbestos. This is a massive health hazard. Vermiculite is a lightweight, pea-sized, flaky gray mineral. Do not disturb vermiculite insulation unless you’ve had it tested by an approved lab to be sure it doesn’t contain asbestos.
Don’t Forget The Small Gaps
Remember to use expanding foam or caulk to seal any openings around plumbing vent pipes and electrical wires. Use caution by wearing gloves and making sure you do not get any foam on your clothes, as it’s nearly impossible to remove from clothes once it sets. When the foam or caulk is dry, cover the area with insulation.
Sealing Air Leaks In The Basement
When it comes to insulating your home, sealing your basement requires more attention. For one, you may not be able to see cracks in the rim joist cavities. Because of this, it is best to seal the top and bottom of the cavity. On top of this, rim joist air sealing is critical in bump-out areas, such as bay windows that extend beyond the foundation. Areas such as these provide greater opportunities for air leakage and heat loss. This is where caulking comes into play, as it’s great for sealing gaps or cracks that are 1/4 inch or less. To fill larger gaps, use spray foam.
It is also recommended that you seal penetrations that go through the basement ceiling to the floor above. This can include holes for wires, water supply and drain pipes, the plumbing vent stack, and the furnace flue.
Insulating The Rim Joist
Once you’ve air-sealed the rim joist area, it is relatively easy to insulate each separate cavity with rigid foam insulation or fibreglass batts. If you’re using batts, cut the insulation to fit and place it against the rim joist without compression, gaps or voids.
Insulating your rim joist can also be done in conjunction with finishing your basement. This would be done when you insulate the basement walls, floor-to-ceiling. Attic and basement air sealing will go a long way toward improving the comfort of you and your family, since your home will no longer act like an open chimney.
Insulating Your Home: Conclusion
At the end of the day, insulating your home is one of the most effective investments you can make. Not only does it improve comfort, but you can have peace of mind knowing you’ve reduced your energy costs and lessened your environmental impact.
Remember, if you have any questions regarding insuring your home, don’t hesitate to reach out to us at isure. Contact us or request a quote today!
Safeguard Your Home
Get a free home insurance quote today and protect what matters most.


Is the snow beginning to fall? If so, isure has Read more

From bubble wrap to live plants, these isure tips will Read more

Every year, we celebrate Earth Hour at the end of Read more